Clean Your Pellet Grill Properly
*This post may contain affiliate links for which I earn commissions.*
A Step-By-Step Guide
Cleaning a pellet grill isn’t nearly as hard as it looks, especially if you know what to expect and do it regularly. So if your grill is starting to smell more like a grease trap than hickory smoke, don’t worry, you’re in the right place.
Let’s walk through exactly how to clean your pellet grill properly, without damaging it.
Why Cleaning Your Pellet Grill Matters
I used to think pellet grills were basically self-cleaning. They burn wood, right? Fire purifies! But over time, I learned that ignoring the mess can cause all sorts of problems:
Grease fires (yep, been there, scary stuff)
Poor temperature control due to clogged sensors
Weird flavors from old ash or grease buildup
Rust and corrosion if moisture gets trapped inside
Bottom line: a clean grill cooks better, lasts longer, and doesn’t leave your ribs tasting like last month’s brisket.
How Often Should You Clean a Pellet Grill?
Here’s what works for me:
Quick clean: every 2–3 cooks (empty ash, wipe grates)
Full clean: every 20–25 hours of cooking
Deep clean: once per season or before long storage
If you cook greasy foods often, like burgers or pork belly, you might need to clean more frequently. Your nose and your food will let you know!
Tools You’ll Need
No fancy gear required. I keep these in a small tote next to my grill:
Shop vac (with a fine ash filter)
Grill brush or nylon scrub pad
Plastic putty knife or scraper
Microfiber cloth or paper towels
Mild dish soap and warm water
Bucket or spray bottle
Heat-resistant gloves (for deep clean sessions)
Optional: A bottle of white vinegar or a degreaser, but keep it food-safe and gentle.
Step-by-Step: How to Clean a Pellet Grill
Step 1: Shut It Down and Let It Cool
First things first, make sure the grill is completely off and cool to the touch. Unplug it, too. Safety first, always. I usually clean mine the next morning after a cookout.
Step 2: Empty the Hopper (If Needed)
If you’re doing a full clean or storing the grill, scoop out any remaining pellets. Moist pellets can swell and jam the auger. I learned this the hard way during a rainy weekend. Don’t skip it.
Step 3: Remove Grates, Drip Tray, and Heat Baffle
Take out the grates, the drip tray, and the heat baffle (that metal plate above the firepot). These parts collect most of the grease and soot. Set them aside for cleaning.
Step 4: Vacuum Out the Ash
Using your shop vac, clean out the firepot and the bottom of the grill. Be thorough around the edges and corners. I aim for this every 2–3 cooks. Ash buildup can mess with airflow and cause ignition issues.
Step 5: Scrape the Drip Tray and Heat Baffle
Use a plastic scraper to remove the baked-on grease from the drip tray and baffle. Be gentle, some are coated with non-stick finishes. If things are extra crusty, soak them in warm, soapy water for 10–15 minutes before scrubbing.
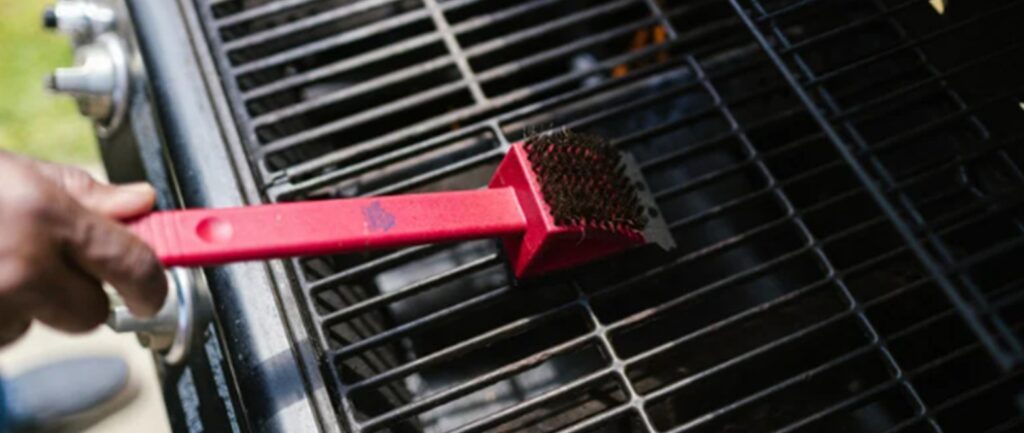
Step 6: Clean the Grates
Soak the grates in hot, soapy water or spray them down with a food-safe degreaser. Then scrub with a grill brush or pad. If you like seasoning your grates like cast iron, go light here, just remove the food residue.
Step 7: Wipe Down the Inside
Take a damp cloth or paper towel and wipe down the interior walls and lid. I’m always amazed (and mildly grossed out) by how much soot and grease comes off. This step helps prevent flaking and rust.
Step 8: Clean the Grease Bucket or Tray
This one’s easy to forget, but super important. Dump the grease, wipe the container, and line it with foil or a disposable liner for next time. A full grease bucket is a fire hazard waiting to happen.
Step 9: Reassemble and Run a Burn-Off
Once everything’s clean and dry, reassemble your grill. Plug it in and run it at high heat (around 400°F) for 10–15 minutes. This helps burn off any lingering residue or soap. Plus, it resets that “fresh grill” smell.
Bonus: Cleaning the Outside
Wipe down the exterior with a cloth and mild soap. Avoid anything abrasive, especially on powder-coated finishes. I’ve also used a stainless steel polish for a little extra shine. Makes it look brand new, even when it’s not.
Final Tips for Easier Maintenance
After cleaning my pellet grill regularly for a few years now, I’ve learned a few tricks that make the job easier every time:
Use liners on your drip tray or in the grease bucket. Saves time.
Clean when warm, not hot. Grease scrapes off easier.
Store pellets in a dry, sealed container so they don’t swell.
Cover your grill when not in use to reduce grime buildup.
Takeaway: Clean Grill, Better BBQ
Cleaning a pellet grill might not be the most exciting part of BBQ life, but it’s a crucial one. A little regular maintenance goes a long way in keeping your food tasty, your grill safe, and your weekends stress-free.
Trust me, once you get in the habit, it’s barely a chore. You’ll thank yourself the next time you fire it up and everything works perfectly.